
CRYPTOPLANET.ORG
Mining
This is an introduction to the concept of cryptocurrency mining – the process of verifying transactions on the blockchain network.
I wanted to publish the first series of posts about the current cryptocurrency mining environment, but that seems like it would be fairly challenging to do without first doing an overview of what mining is.
I’ll try and keep this as short as possible, but it’s definitely the most complex aspect of the cryptocurrency system.
There are 4 basic ways how you can mine.
Phraseology
Proof of work (With Proof of Work, the probability of mining a block depends on the work done by the miner)
Proof of stake (Proof-of-stake is a method of securing a cryptocurrency network through requesting users to show ownership of a certain amount of currency)
Proof of burn (Proof of burn is method for bootstrapping one cryptocurrency off of another. The idea is that miners should show proof that they burned some coins)
Proof of capacity (HDD minning, miners pre-generate chunks of data known as 'plots' which are then saved to disk.
The number of plots you store is effectively your mining speed)
CPU
GPU
In the beginning, mining with a CPU was the only way to mine bitcoins. Mining this way via the original Satoshi client is how the bitcoin network started. This method is no longer viable now that the network difficulty level is so high.
You might mine for years and years without earning a single coin. But BTC isn´t the only one crypto in the world. You can still mine many alts with using CPU. For example Quark, Primecoin, Monero.
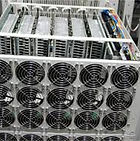
ASIC
Soon it was discovered that high end graphics cards were much more efficient at bitcoin mining and the landscape changed. CPU bitcoin mining gave way to the GPU (Graphical Processing Unit). The massively parallel nature of some GPUs allowed for a 50x to 100x increase in bitcoin mining power while using far less power per unit of work. While any modern GPU can be used to mine, the AMD line of GPU architecture turned out to be far superior to the nVidia architecture for mining bitcoins and the ATI Radeon HD 5870 turned out to be the most cost effective choice at the time.
You can still mine with profit. Algoritms X11, X13, X15, NIST5.

HDD
The bitcoin mining world is now solidly in the Application Specific Integrated Circuit (ASIC) era. An ASIC is a chip designed specifically to do one thing and one thing only. Unlike FPGA's, an ASIC cannot be repurposed to perform other tasks. An ASIC designed to mine bitcoins can only mine bitcoins and will only ever mine bitcoins. The inflexibility of an ASIC is offset by the fact that it offers a 100x increase in hashing power while reducing power consumption compared to all the previous technologies. For example, a good bitcoin miner like the Monarch from Butterfly Labs provides 600 GH/s (1 Gigahash is 1000 Megahash. 1 GH/s = 1000 MH/s) while consuming 350w of power. Compared to the GPU era, this is an increase in hashrate and power savings of nearly 300x. Algoritms SHA256, Scrypt.
On 10th August 2014. New possibility of mining arrived. Only one coin at this time.
Burstcoin uses a new algorithm for proof of hdd capacity (POC) mining. Miners pre-generate chunks of data known as 'plots' which are then saved to disk. The number of plots you store is effectively your mining speed. Every block the miner will skim through the saved plots, and come up with an amount of time until it is able to mine a block if another block hasn't yet been found. After reading through the plots is complete, your hardware can idle until the block.
Mining guides
CPU
If you want to mine with your cpu. Here is the guide.
This guide is intended to help miners setup CPU solo mining of scrypt-based cryptos on Windows, and I am using CasinoCoin as an example. All other scrypt-based crypto currencies are free to point to this thread to help new miners get started, but please provide credit. For other cryptos, substitute the appropriate parameters (ie. RPC port, file names, etc) with those specific to to the crypto.
This tutorial is broken up into the following sections:
-
Downloads
-
File and Directory Setup
-
CasinoCoin Configuration
-
Solo Mining
Downloads
You'll need to download the following applications:
-
Pooler's cpuminer, or find the latest from the SourceForge repository
-
7zip or any other unzipper application
NOTE: Most antivirus applications will identify cpuminer as a trojan horse -- however, this is a false positive, as noted here, here and here.
File and Directory Setup
If you already have an unzip program, then you won't need to download 7zip. Else, download and install 7zip.
I like to keep all crypto related applications grouped into one folder, so create a folder called "crypto" on your C: drive (ie. C:\crypto).
-
In Windows Explorer, create a new folder called "crypto" on your C: drive (ie. C:\crypto)
-
Move the wallet and cpuminer files that you just downloaded into this directory.
-
Extract the contents of the wallet using 7zip (right click on the file > 7-Zip > Extract Here)
-
Extract the contents of cpuminer using 7zip (right click on the file > 7-Zip > Extract to "<some folder name>")
-
Rename the CasinoCoin wallet folder (ie. casinocoin-1.0.0.3) to CasinoCoin.
-
Rename the cpuminer wallet folder (ie. pooler-cpuminer-2.3.2-win32) to cpuminer. The folder should look like something below:
CasinoCoin Configuration
-
Open up the CasinoCoin folder and create a shortcut to casinocoin-qt.exe. To create a shortcut, click on casinocoin-qt.exe and right-click. A sub-menu is displayed -- click on Create shortcut . A shortcut is now listed called casinocoin-qt.exe - Shortcut.
-
Right click on the shortcut and select Properties within the sub-menu.
-
In the Target field, add -server to the end of the existing path and hit OK. This sets the wallet in server mode when you launch the shortcut.
-
Drag this shortcut to your desktop for easy access when launching the wallet application.
-
Run the wallet application by double clicking on the shortcut.
-
An error message will be displayed. Click on OK. The wallet application will quit.
-
Open up Windows Explorer. In the file path bar, type in %appdata% and hit Enter.
-
Double click on the CasinoCoin folder.
-
Create an empty CasinoCoin configuration file by right clicking within the directory > New > Text Document
-
Name the file casinocoin.conf. Make sure the file doesn't end with a .txt extension. The file should be listed as casinocoin.conf
-
Open casinocoin.conf using your preferred text editor such as Notepad.
-
Copy and paste the following below:
Code:
rpcuser=yourusername
rpcpassword=yourpassword
rpcallowip=*
server=1
addnode=seed.casinoco.in
addnode=seed1.casinoco.in
addnode=seed2.casinoco.in
addnode=188.165.218.116
-
Change yourusername and yourpassword accordingly and save the file.
Solo Mining
-
Open up the Command Prompt by clicking on the Windows Start button > All Programs > Accessories > Command Prompt
-
Type the following below and press Enter. You'll need to changing the rpcport, rpcuser and rpcpassword fields to match what is in the casinocoin.conf that you previously created.
Code:
"C:\crypto\cpuminer\minerd.exe" -a scrypt -o http://127.0.0.1:<rpcport> -O <rpcuser>:<rpcpassword>
-
NOTE: When running cpuminer (minerd.exe), your anti-virus software might stop the execution of the program. You'll need to add minerd.exe onto the safe list in order for it to execute. Refer to your anti-virus manual on how to do this.
-
If everything goes well, you've begun hashing and should see a similar output:
CPU mining is very slow compared to GPU, FPGA and ASIC mining. When a block is discovered, the block reward will immediately show up in your wallet alongside the pickax icon.
Happy hashing!
GPU
Here is the guide how to mine DOGEcoin with your GPU.
While CPU mining through the dogecoin client is a good start to grabbing a few dogecoins, it really doesn’t compete with mining with a dedicated graphics cards(GPU) instead.
With a CPU you may get a few coins a day, a GPU with the current difficulty of around 350 you can get thousands , depending on the card.
Just a little warning before you start: Like CPU mining, GPU mining is very intensive on the computer. I would not recommend running very high settings unless you have adequate cooling. Both may reduce the lifespan of your computer components as well, if you are running the mining program 24/7, so keep that in mind when deciding whether or not you want to mine.
GPU Mining with CGMiner
Those with NVidia cards may want to check out cudaMiner instead. So this tutorial may not apply to you. But those with ATI cards will want to check this out.
If you haven’t already signed up for a mining pool, be sure to do so, as instructed here. We will use this information to further configure CGMiner. You may wish to sign up for a second pool if you want a backup incase the first pool goes down. This way you will continue to mine even if the first pool is unavailable.
1. The first thing you will want to do is download a program called CGMiner. CGMiner only supports GPU mining in versions up to 3.7.2. (3.6.0 used in tutorial but it should be nearly the same).
2. After you download the proper version of CGMiner, extract it to a directory.
3. Open up the location that you have extracted the files and look for a file titled “example.conf”.
4. Open it with notepad or a text editing program.
5. To get started quickly, We can strip the file down, because most of the configuration probably won’t be correct for you. Important: We also need to add a line to tell it to use the proper method for mining dogecoin. “scrypt” : true, (Delete everything and copy and paste this if you want):
{
"pools" : [
{
"url" : "http://url1:8332",
"user" : "user1",
"pass" : "pass1"
}
],
"scrypt" : true,
"kernel-path" : "/usr/local/bin"
}
If you have backup pools, keep additional locations so that you can configure those as well.
6. Now lets edit this to have our own pool information (this assumes you already signed up for a pool, described here) to the file:
{
"pools" : [
{
"url" : "stratum+tcp://www.suchcoins.com:3333",
"user" : "weblogin.WorkerName",
"pass" : "workerPassword"
}
],
"scrypt" : true,
"kernel-path" : "/usr/local/bin"
}
6. When finished, save the file and close it.
7. Rename the example.conf file to cgminer.conf.
8. You should now be able to start mining. Simply launch cgminer.exe in the same directory as the config file.
The defaults for CGMiner should be pretty safe, but be sure to monitor your GPU temperature. If it goes over 80C for a long period of time, I’d recommend stopping the program and reading about the advanced settings for CGMiner so that you can reduce the strain on your graphics card. For example, you might want to check out “intensity” and “temp-target” for starters. The same goes for getting the most out of your cards for mining. There are several settings you can tweak for getting more performance out of your cards.
In general though, I really wouldn’t recommend mining 24/7 with any older graphics cards. If it is more than a few years old, chances are that the dogecoin you will mine won’t be worth the electricity costs and possible damage to your computer, unless you are running it on very safe settings. But if you want to give it a quick try and see how it all works, just make sure you are running at safe temperatures and it shouldn’t be any more straining than playing an intense 3d game.
Happy hashing!
ASIC
Mining with ASICs is very similar to mining with GPUs with a few exceptions. Getting started follows the same course as GPU mining. Follow the steps on the “How to mine Bitcoins” page to set up your personal wallet as well as your account with a mining pool of your choice.
The primary difference is that you will have to use different mining software with ASICs as GUI Miner does not have ASIC support.
The program that I recommend is called BFG Miner and can be downloaded from the BFG miner download page. Scroll down until you reach the more recent releases and open look for the release that corresponds with the operating system you are using. You may have to mouse over and look at the status bar to see the complete file name.
Download the file and extract it to a directory on your hard drive and open the directory in your file explorer. After connecting your ASIC to your machine and allowing the hardware to install on your computer, open the bfgminer application.
Once the program is started, it will prompt you for the URL for your pool. In my case, I use stratum.bitcoin.cz:3333 for Slush’s Pool, but these have a tendency to change from time to time, and if you are unable to connect, check your pools instructions for the updated address.
After that, you will be prompted for your username and password. Remember that in this field it is also asking for your worker name as well.
I name my workers with a number, so my user name is formatted as USERNAME.1 with a period separating the user name and the worker ID.
After that, you will be prompted for your password. Each worker has it’s own password, and if you are using Slush’s Pool, it will be listed right next to your worker name when you log into your account.
Once you are logged in, the program will start mining with all available devices, including GPUs.
I personally choose not to mine with GPUs so I turned mine off. To do this, click “M” on your keyboard and use your arrow keys to select the device you wish to modify and click the “D” key to disable any devices you do not with to mine with. Hit the “Enter” key to return to the main screen.
Finally, from the main screen, hit the “S” key to enter the settings menu and “W” to write a config file that will store your mining information so you don’t have to type it in each time you restart the program.
Happy hashing!
HDD
This is meant as a quick start guide for those having issues with setting their system up on windows.
First download this:
Wallet: https://mega.co.nz/#!ml4RTKBR!8g0-7RNjkIowgIJuhu-GHLXJRkKRxBlGh_tkbI4Sar4
Next download this:
POCMiner: https://mega.co.nz/#!b0pzHajA!ERk068l5NS6kR7zdLdTgltqyPw3Z60lwAWvgXtNQNTk
And lastly, ensure that you have the latest Java downloaded onto your PC. It seems as though incorrect java versions and correct java installation were the main causes of 50% of the problems listed in the beginning pages.
Step 1: Extract everything to the root of the drive you want to use (ie. the main driver directory). You should wind up with everything from the pocminer_v1 folder showing in the root directory, and with the Burst_1.0.0 folder in the root directory (containing the wallet program).
***you cannot extract this file to the root along with the miner, as they both contain files with the same names, and they will overwrite one or the other. Just leave the wallet in its own folder***
Step 2: Type a PASSWORD of your choosing into the passphrase text doc and save it.
Step 3: If using windows, replace the first word "java" in each of the .bat files with "C:\Windows\SysWOW64\java" and "save as" each of them as .bat files again.
Example for the run_generate .bat file:
Original; java -Xmx4000m -cp pocminer.jar;lib/*;lib/akka/*;lib/jetty/* pocminer.POCMiner generate %*
modified: C:\Windows\SysWOW64\java -Xmx1000m -cp pocminer.jar;lib/*;lib/akka/*;lib/jetty/* pocminer.POCMiner generate %*
Step 3a: Many of the values in the original .bat files were causing issues for my computer, so I changed the -Xmx4000m (or whatever your # was) to a lower value like 1000 or 500 (ie. -Xmx1000m) and it began working. This will be entirely system dependent, and is like tweaking a normal miner's settings to find what works best.
Step 4: Double click the run_dump_address .bat file
Step 5: check the address .txt file and retrieve your your account #
Example for address is:
Found address: *whateverpassyouentered* -> *youraccount#*
Step 6: Copy your account number and paste it into the run_generate .bat file along with your plot description and how many threads you wish to use. plottostartwith=0 or 1 / plottoendwith=800000 (for every 200 Gig section)
Example for this is:
C:\Windows\SysWOW64\java -Xmx1000m -cp pocminer.jar;lib/*;lib/akka/*;lib/jetty/* pocminer.POCMiner generate *youraccount#* *plot#tostartwith* *plot#toendwith* 1000 4
Step 7: Double click the run_generate .bat file and a command window should open, and you should see the computer begin to start creating plots, beginning with whatever you specified in your file.
*THIS TAKES A LONG TIME* (you can still start mining while creating plots, but don't expect your chances to be high within the first 8-10 hrs. It also took me personally about 8 hrs to plot my first 200 Gig section, so go watch a movie or get a bite to eat when this guide is done)
Step 8: Double click the run .bat and it will open briefly and then close.
Step 9: Open the Burst_1.0.0 folder and Double click the run .bat file there and let it install
Step 10: double click the Burst_Wallet internet shortcut file
Step 11: enter your password (which is the one you entered into the passphrase text file earlier). This should open your account "front end" gui.
Step 12: Go back to the root directory and double click the run_mine .bat file.
At this point you should have a total of 3 command line windows open...your computer should be generating plots in one command window, have initialized the Burst server and come to the nxt.apiServerEnforcePOST="true" line in another, and yet a thrid command window should be displaying your mining. The mining will repeatedly generate lines such as:
{"height":"2","generationSignature":"c26ef60f51aa5fc6225a481f08e51903085067a8a7d
558f94712d702f2a67bb4"}
{"height":"3","generationSignature":"a62b500a5dfc7f5e614fcf4917d83ffccd01e9c9643
d7d0e982c75043d27baff"}
Error reading file: 10818239041755946932_1_800000_500
{"height":"3","generationSignature":"a62b500a5dfc7f5e614fcf4917d83ffccd01e9c9643
d7d0e982c75043d27baff"}
{"height":"3","generationSignature":"a62b500a5dfc7f5e614fcf4917d83ffccd01e9c9643
d7d0e982c75043d27baff"}
New best: 10818239041755946932:160093
Submitting share
{"result":"deadline: 508"}
This is good, and it means YOU ARE NOW MINING. The "deadline" is a measurement of seconds until you may generate a block (provided no one else has already generated one). Yes, it is a bit of a race, but as your plot # increases, so do your chances of hitting/solving a block. I believe you can compare the size of your plot to what would be your hashrate if mining a normal scrypt coin.
Any other issues with a single step can be analyzed by typing "pause" on a seperate line in any of the .bat files, which will give you time to read and post whatever error you are experiencing.
Happy mining!